Creating a new diagram
- Select File > New > Project…
- Select Papyrus > Papyrus Project and click Next.
- Choose a project name and click Next.
- Select UML as Diagram Language and click Next.
-
Choose a name for your diagram, select UML Class Diagram, and load the template with basic primitive types.
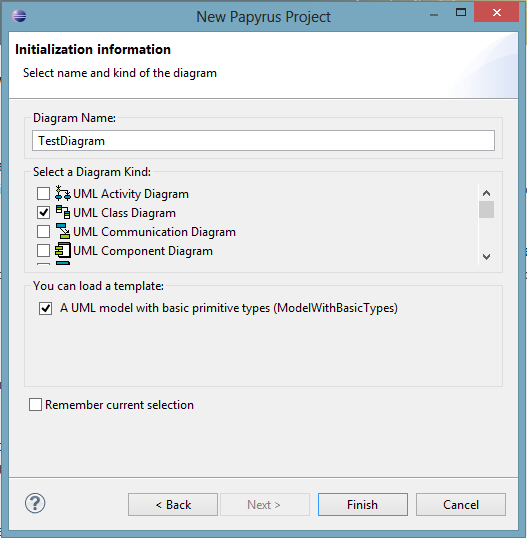 Create new Papyrus Project
 - Finish.
Select model elements from the palette on the right-hand side and add them to the diagram. Properties and operations are likewise added to classes by selecting them and clicking on the respective class.
Associations can be found in the Edges section of the palette. The Properties view provides additional options: right-click on an element and select Show Properties View.
Creating and Applying a UML Profile
- Select File > New > Other…
- Select Papyrus > Papyrus Model.
- Choose a file name and make sure that it will be created in the Papyrus project from above.
- Select Profile as Diagram Language.
- Choose a name for your profile and select UML Profile Diagram.
Stereotypes need to extend (Relationship “Extension”) a metaclass such as “Class” (Import Metaclass) in order to be applicable to instances of this metaclass. To apply a profile to a UML diagram, select the Profile tab in the properties view (left click in the canvas and select Show Properties View) of the model itself (click somewhere on the blank canvas) and click the “Apply profile” button (green plus sign). Similarly, you can apply a stereotype to a model element, for example a class.