This tutorial explains how to implement a business application with several layers in Visual Studio 2012 Ultimate (using SQL Server 2012 Express, see README in library application). It uses ADO.NET Entity Framework and ASP.NET. First, have a look at the library application (.NET) as an example of such an application. Make yourself familiar with Visual Studio and with the structure of the library application in .NET. Then, proceed with this tutorial to create a similar business application from scratch.
In Visual Studio, applications are developed in so called "solutions". A solution contains projects of different types. In this tutorial, two projects will be created:
- A class library representing the business layer (data and logic).
- A web application.
- Remove an old database.
This is just an example. It would also be possible to split the data and logic parts into two projects or to choose a different structure.
I. Creating the Business Layer
- Create a C#-"Class Library" by selecting "File -> New -> Project..." from the menu bar. Choose a name for the project ("Name" at the bottom of the window), e.g. "BusinessLayer", and for your application ("Solution").
- First, create the data model of your application. In the "Solution Explorer", right-click on the newly created project and select "Add -> New Item...". Select "ADO.NET Entity Data Model" and choose a name. In the following wizard, choose "Empty model" as the initial content of the data model and click "Finish".
- Create your data model by dragging elements (entities, associations) from the toolbox onto the designer. If it is not visible, open the "Properties Window" from the "View" menu. To edit the properties of an element, select it in the designer. This approach is called "Model First".
- When your data model is complete (at least a first version of it), you have to generate a database schema for it.
- Open the "Server Explorer" (under "View" in the menu bar).
- Right-click on "Data Connections" and select "Create New SQL Server Database...".
- Set "Server name" to "localhost\sqlexpress" and choose a "New database name". Press OK.
- Right-click on the white background in the Entity Designer and choose "Generate Database from Model...".
- Select the data connection you just created, make sure it will be saved in App.config and click "Next".
- Save the generated script to a file of your choice and click "Finish". Your conceptual Entity Data Model is now mapped to a relational schema. However, the tables of this schema have not yet been created in the database.
- Open the SQL script from the previous step. Right-click somewhere in the editor and choose "Execute SQL".
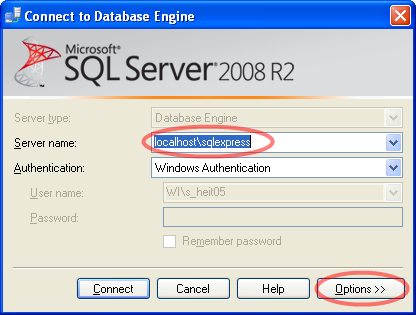
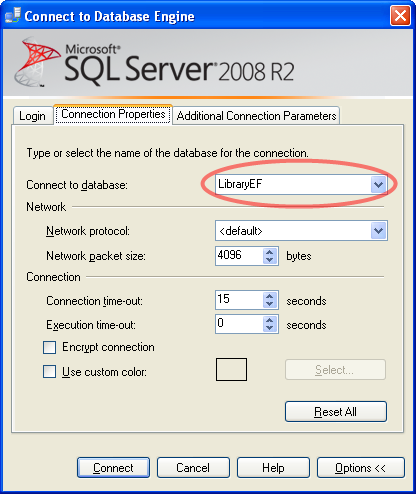
- When asked to connect to a database, set "Server name" and "Connect to database" (press "Options >>", then switch to the tab "Connection Properties") to the respective values from step 3. Click "Connect". This will create the necessary tables.
- The Entity Designer automatically creates C# classes for entities and a container class. Use these classes in your business logic to access the database.
II. Creating the Web Layer
- Choose File->New->Project... and create a "ASP.NET Empty Web Application" ("Visual C# > Web"). At the bottom of that window choose a name e.g. "WebLayer" and select "Add to solution".
- In the solution explorer, right-click on "References" of your web project and select "Add Reference...". From the tab "Projects", choose your business layer project and click "OK". This reference allows you to access public classes and methods of the business layer.
- Copy the connectionStrings section from the App.config file of the business layer project to the Web.config file of the web project. This is necessary as only the top-level configuration is in effect when running the application.
- Implement the web application, referencing the business layer where necessary.
III. Remove an old database
- By accident you may have deleted a database connection within VisualStudio. There are two ways of deleting an old database:
- Using Transact-SQL
- Connect to the Database Engine
- From the Standard bar, click New Query
- Copy and paste the following example into the query window and click Execute. The example removes the LibraryEF database
USE master ;
GO
DROP DATABASE [LibraryEF];
GO
- Using SQLCMD
- Open a command-line
- Connect to the Database Engine by executing:
sqlcmd -S localhost\sqlexpress - Enter
drop database [LibraryEF];andgo - Enter
exitto leave the SQL command-line
- Using Transact-SQL