Contents
- Installing Git
- Installing Docker
- Installing the latest Java 17 JDK
- Installing Eclipse
- Extending Eclipse with Xtext and Xtend
Installing Git
Git can, for example, be downloaded here.
Installing Docker
Which tool to install depends on your operating system:
Windows 10 Professional 64-bit
Install the current Docker for Windows application.
In case this does not work (there are some hardware requirements such as a processor with Hyper-V support and virtualization enabled in the BIOS settings) you can fall back to the solution for other Windows versions.
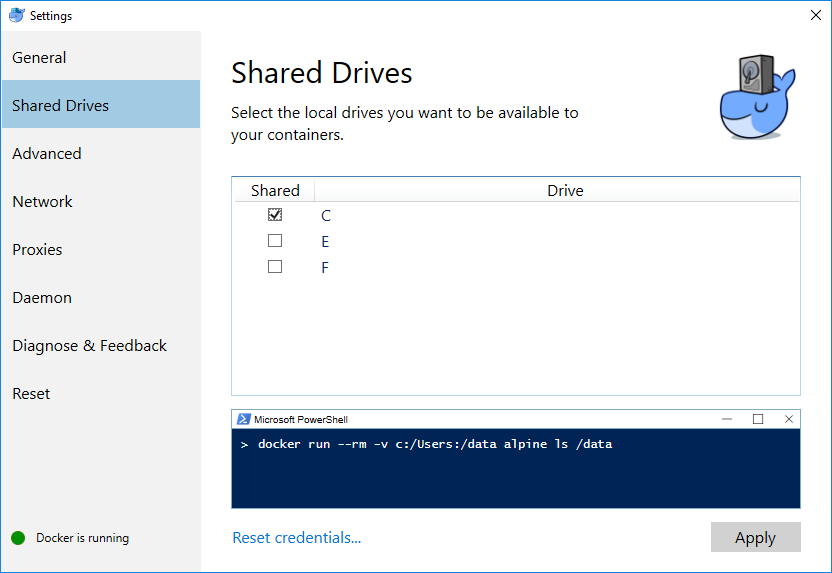
After successfully installing Docker, open the Docker settings (right click on the Docker icon in the Windows toolbar), select "Shared drives" and make sure your drive that contains the ACSE files (see "Installing Eclipse" section below; "C:" in this tutorial) is checked.
After successfully installing Docker, open the Docker settings (right click on the Docker icon in the Windows toolbar), select "Shared drives" and make sure your drive that contains the ACSE files (see "Installing Eclipse" section below; "C:" in this tutorial) is checked.
Linux
Install the current Docker for Linux application that is available for multiple distros.
Mac (2010+) with macOS 10.10.3 Yosemite or newer
Install the current Docker for Mac application.
Other Windows or Mac versions
Older Versions of Windows or Mac that are not supported by the current tool can use the Docker Toolbox application.
Internally, Docker is installed within a virtual machine so that you can use it.
However, this makes the environment setup a bit more complicated as will be highlighted in the following sections.
For Windows users with Docker Toolbox, you additionally need to establish a file system connection to the Docker machine. Therefore:
For Windows users with Docker Toolbox, you additionally need to establish a file system connection to the Docker machine. Therefore:
- In your file system, create a folder, e.g.
C:\ACSE. - Open VirtualBox, select the "default" machine, click on Change.
- In the "Shared directory" tab, add a new entry that points to the local folder you just created and give it the name
c:/ACSE. Also, activate the checkboxes for automatic mounting and persistent creation. - Close all dialogues with OK.
- Restart the machine by executing docker-machine restart.
- To verify your installation, start a Docker command line and run
docker run hello-worldwhich should output some information for getting started with Docker.
For windows users: An annoying message “Unable to use system certificate pool: crypto/x509: system root pool is not available on Windows” might appear frequently. Nothing to worry, it’s a known issue and fixed as of version 17.04; anyway it should have no impact on running Docker. - You can continue with the Docker tutorial starting from Step 2 to get some insights in how to handle Docker and learn about containers, images, Docker Hub and so on. However, necessary commands will also be provided on the exercise sheets.
Docker Compose is an additional tool, which allows to manage multiple containers at once. Docker Desktop for Windows and Mac includes Compose. Linux users have to install Docker Compose separately; Docker Toolbox already bundles a version.
Installing the latest Java 17 JDK
- Make sure that the latest version of the Java 17 Development Kit is installed on your computer. If the JDK is properly installed on your computer, you can jump to step 4 of this section, otherwise continue with the next step.
- Go to a provider of your liking, e.g., https://adoptium.net/ or http://www.oracle.com/technetwork/java/javase/downloads/index.html and follow the instructions to download the latest version of the Java 17 Development Kit for the operating system of your computer.
- Install the JDK to a directory on your computer, e.g.
C:\Java\<jdk>on Windows. - Create an environment variable called
JAVA_HOMEthat points to the JDK installation directory, for exampleC:\Java\<jdk>. You could also be able to directly set this variable while installing the JDK. - You can check your installation by typing
javac -versionandjava -versionon your command line which should output the java version you just installed. If this is not the case you might also add the/bindirectory of your Java installation to yourPATHenvironment variable (keep in mind you have to open a new command line in order to see changes to the environment variables). For Linux and macOS, see the section at the bottom of this document.
Installing Eclipse
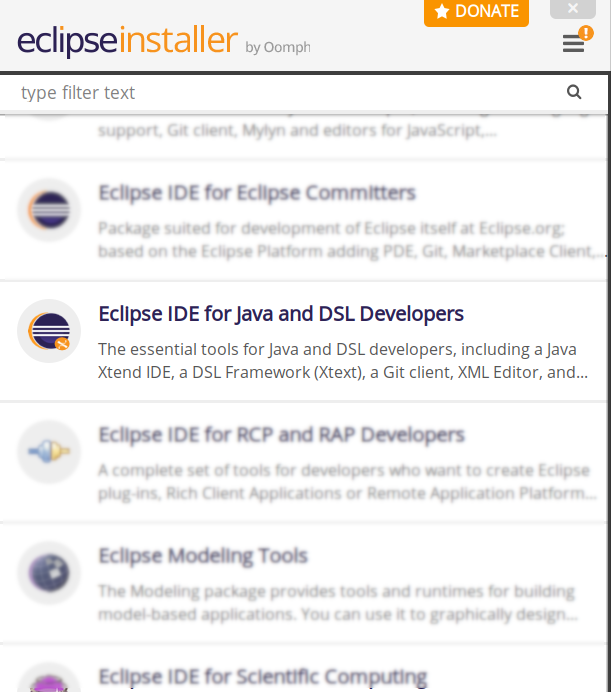
- Download the Eclipse IDE for Java and DSL Developers for your operating system from Eclipse IDE for Java and DSL Developers. Via the given page an installer will be downloaded.
- Extract the archive and open the installer.
- Be sure to select
Eclipse IDE for Java and DSL Developers. This package already includes Xtext and Xtend which otherwise have to be installed manually. It is strongly suggested to select this option as it accounts for interdependencies!.
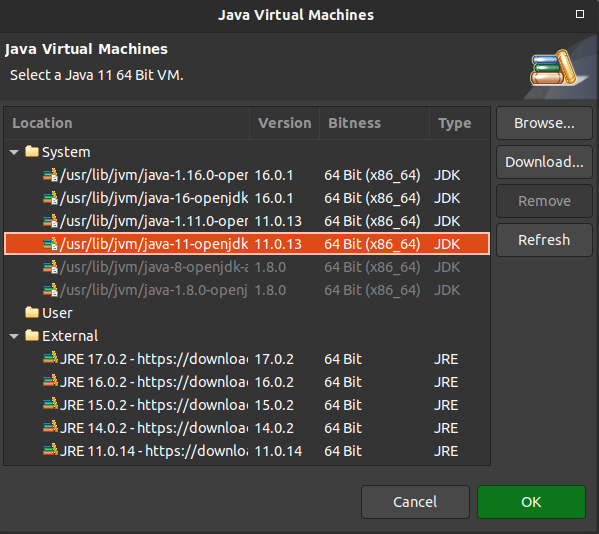
- Set up the Java 17 VM. For this, select the Java 17 JDK you installed in the previous step.
- Start installing. The respective packages are downloaded. This might take some time.
- Start Eclipse. The executable (
eclipse.exeoreclipse) is located in the installation directory. Wait for the “Workspace Launcher” window to pop up and select a workspace directory, for exampleC:\ACSE\projects. This path must not contain any spaces either. The workspace directory is where all your projects will be stored. You may check the “Use this as the default and do not ask again” box to avoid this dialog from appearing on the next start. You might also want to create a different workspace for each project. Click “OK” to close the dialog and get to the workbench window.
The Eclipse IDE comes with a Git integration tool, Java Development tools, Xtext and Xtend, and a Maven integration.
Extending Eclipse with Xtext and Xtend
You can skip this step if you already installed the Eclipse IDE for Java and DSL Developers.
- Select Help > Install new Software…
- Specify Work with: Xtend - http://download.eclipse.org/modeling/tmf/xtext/updates/composite/releases/. This can take some time.
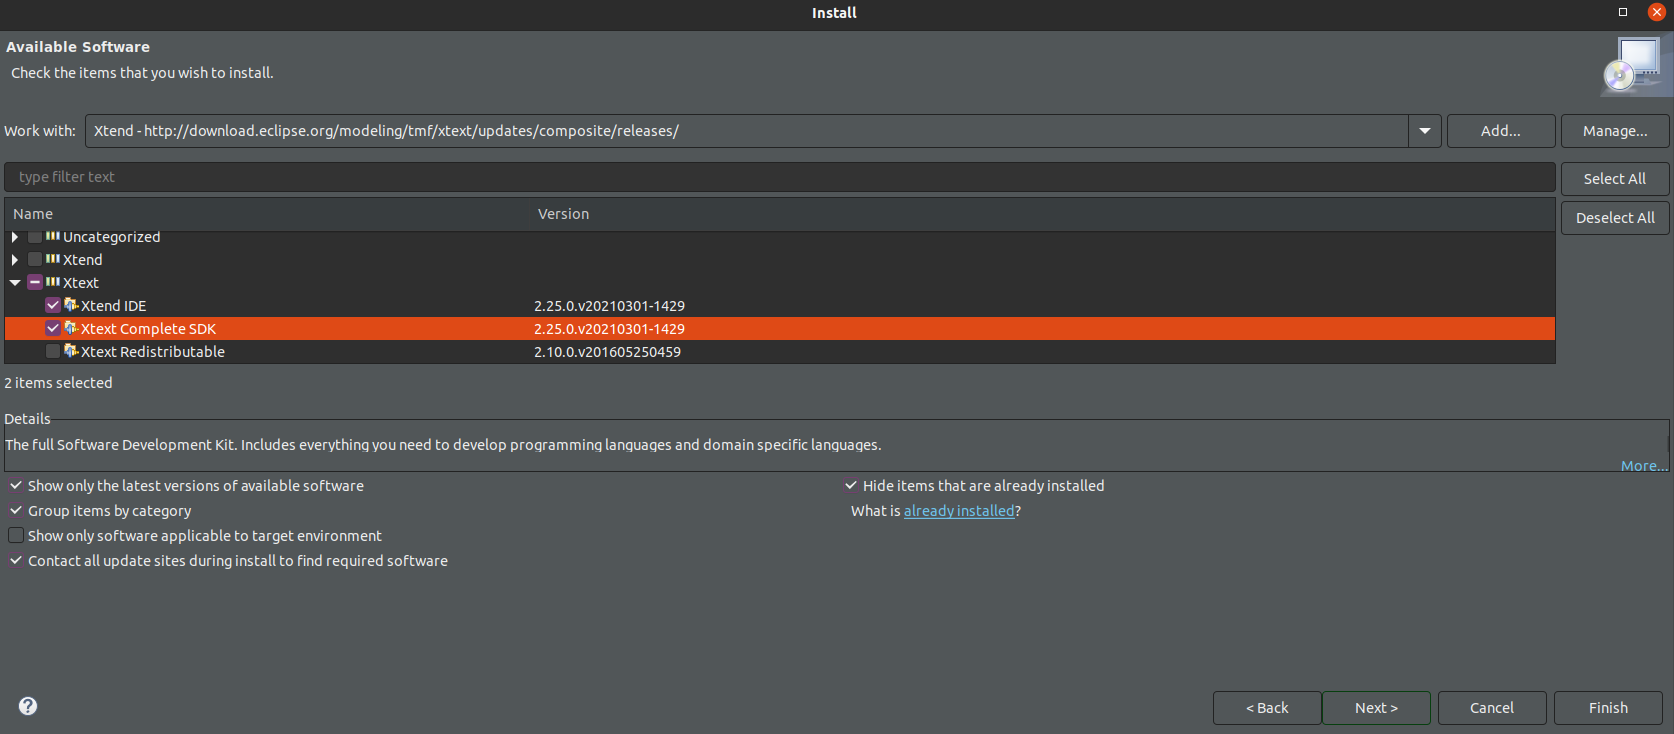
- Wait for the list of software to load (this can take some time) and select all of the following items:
- General Purpose Tools
- Xtext Complete SDK (at least version 2.30!) for domain-specific language development
- Programming Languages
- Xtend IDE (at least version 2.30!) for model-to-text transformations
- General Purpose Tools
- Click Next two times, check Accept, click Finish and wait for the packages to be installed.
- Click Yes when prompted to restart.
Installing Papyrus
- Select Help > Install new Software…
- Specify Work with: https://download.eclipse.org/modeling/mdt/papyrus/updates/releases/2023-03/
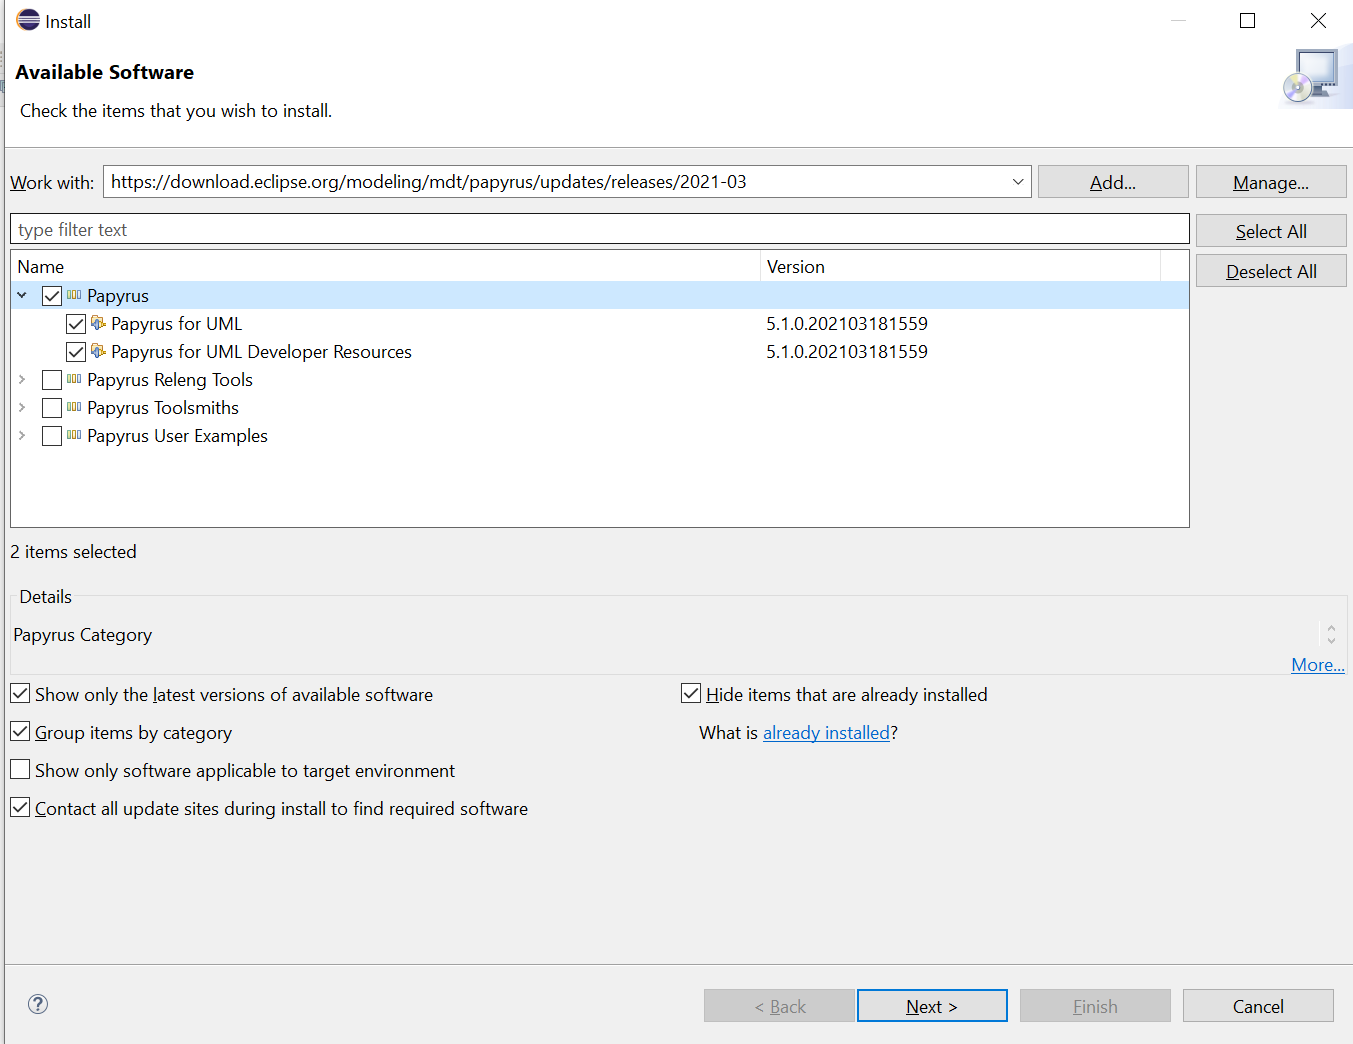
- Select the version of Papyrus
- Click Next, read and accept the license aggreement and click Finish
- Click Restart now when prompted to restart
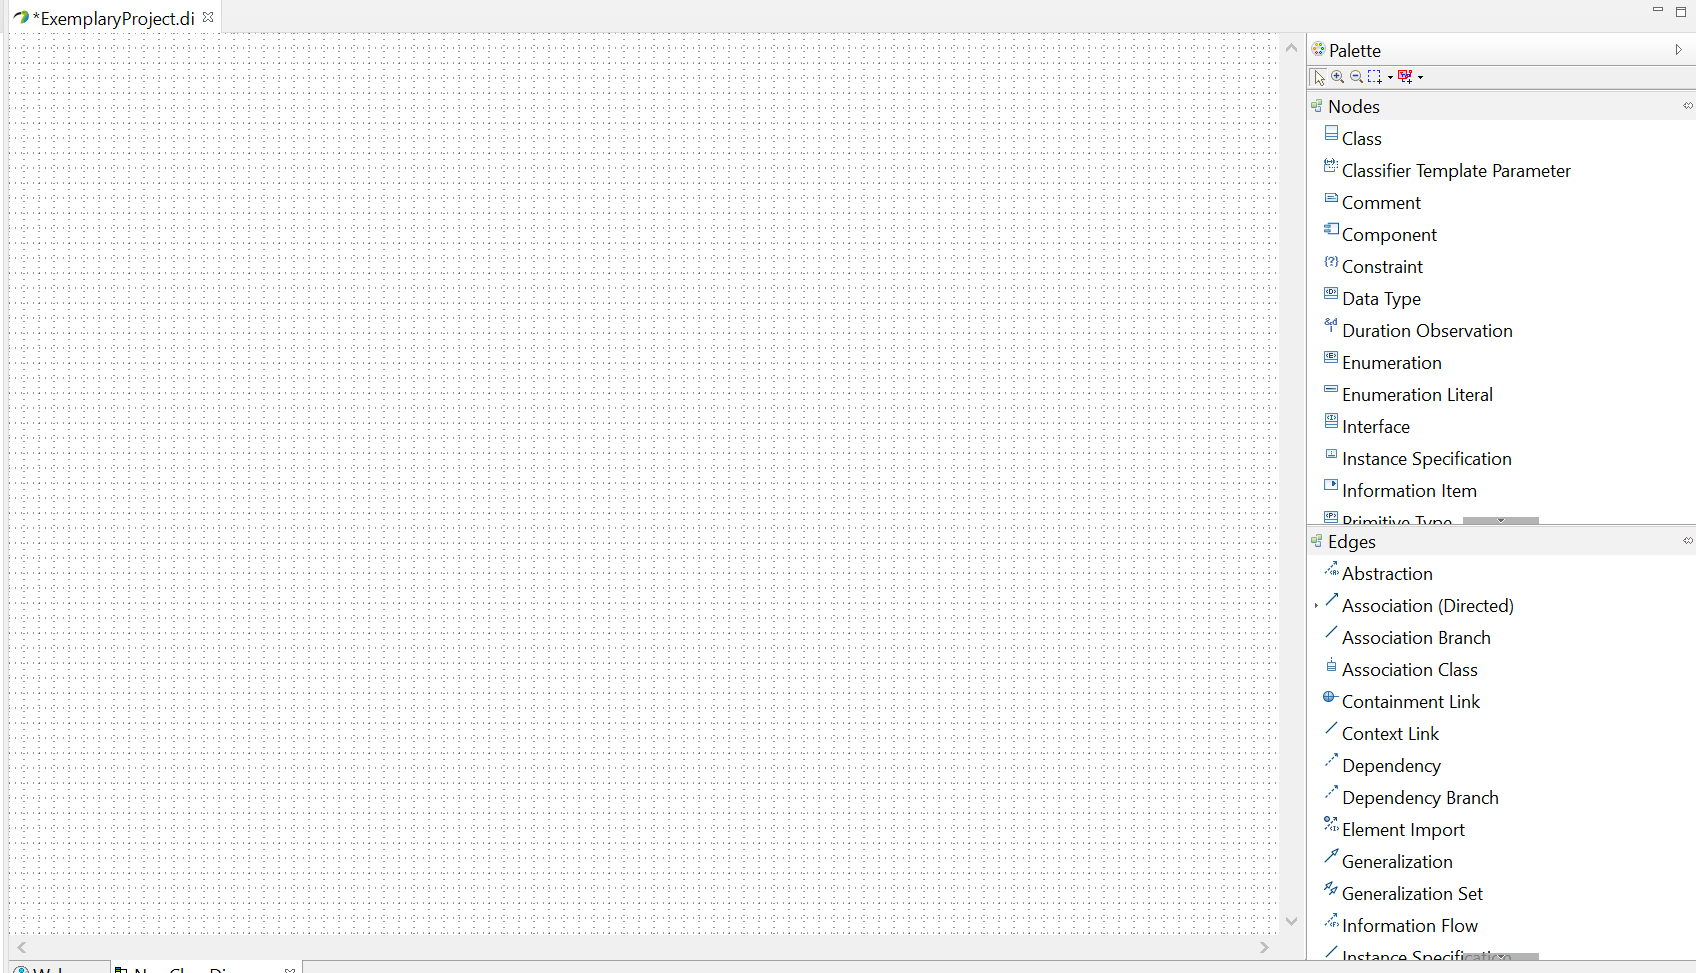
- After creating a Papyrus project, you now can model, e.g., class diagrams with the known UML elements.
How To Set Environment Variables
- Windows 7 / 8 / 10: Control Panel (Systemsteuerung) - System - choose Advanced System Settings (Erweiterte Systemeinstellungen) on the left - Advanced tab (Erweitert) - Environment Variables button (Umgebungsvariablen)
- Linux / macOS: Open you ~/.profile- and ~/.bashrc- or ~/.bash_profile-files. Type
export JAVA_HOME=/usr/lib/jvm/<your version>(using your installation path, of course). If Java is still not found you might need to add it to the path environment variable usingexport PATH=$PATH:$JAVA_HOME/bin. You need to log out and log back in again for the changes to be applied.
Congratulations, you have successfully set up your development environment!