Contents
Quickstart
- Make sure Docker and Docker Compose are properly installed (tutorial) and you know your Docker IP (typically
localhost; when using Docker Toolbox, rundocker-machine ipon your command line). - Copy the example applications to your projects folder, e.g. with
git clone https://wiwi-gitlab.uni-muenster.de/pi-examples/acse-docker-simple-service.git cd acse-docker-simple-service - Use Docker Compose to build the Docker images by running
docker-compose build - Use Docker Compose to run the example microservices
docker-compose up - In your browser navigate to
http://DockerIP:8080/SimpleClient/to access the user interface of theSimpleClientmicroservice andhttp://DockerIP:8081/SimpleServer/?first=41&second=1for the REST API of theSimpleServerservice.
What just happened?
The microservice example application consists of the SimpleClient that presents users with an HTML page for adding two integer values. For this task, it relies on the SimpleServer service that provides the implementation. Both services run in separate containers and Wildfly instances and communicate only via REST API calls.
To manage the two services, we use Docker Compose. The docker-compose.yml file at the root folder of the project contains the necessary description. It specifies the build contexts (the folders SimpleClient and SimpleServer) as well as the name of the two Docker images. The docker-compose build command uses this information to initiate a build of the images.
Docker images are build by following the steps of a Dockerfile that is part of the build context. This example uses a similar Dockerfile for both services (see e.g. SimpleClient/Dockerfile). In this case, the image build process is separated into two stages: the compilation of the Java service into a WAR archive and the final assembly info a WildFly environment.
Each stage starts with a FROM directive that determines the starting point, i.e. a Docker image that already exists and that should be extended. The compilation stage is based on the gradle:4.6-jdk8-alpine image, which is downloaded from the Docker Hub registry if it does not exist locally. This image contains the Java 8 JDK as well as Gradle, a build tool that automates the compilation. The next steps, COPY and RUN, add the Java code from the build context into the image and instrument Gradle to build the WAR archive.
Docker images are organized into layers, where each layer contains a set of changes. Together they form the file system for the container. In general, each directive of the Dockerfile creates a new layer. As a consequence, removing intermediary files only marks them as deleted in the new layer and does not actually remove them from the layers before. Docker hence gives the advice to either remove intermediary files in the same step or use multiple stages.
To run the microservices, only the WAR file is necessary. We therefore start a new stage with a new FROM directive, which starts from the existing image jboss/wildfly:12.0.0.Final. This image contains an installation of WildFly so the only required step is to copy the WAR file from the last stage into this one. The next directives add an admin user (RUN), specify that the ports 8080 and 9990 are exposed (EXPOSE) and set the default command that is executed when a new container is started (CMD).
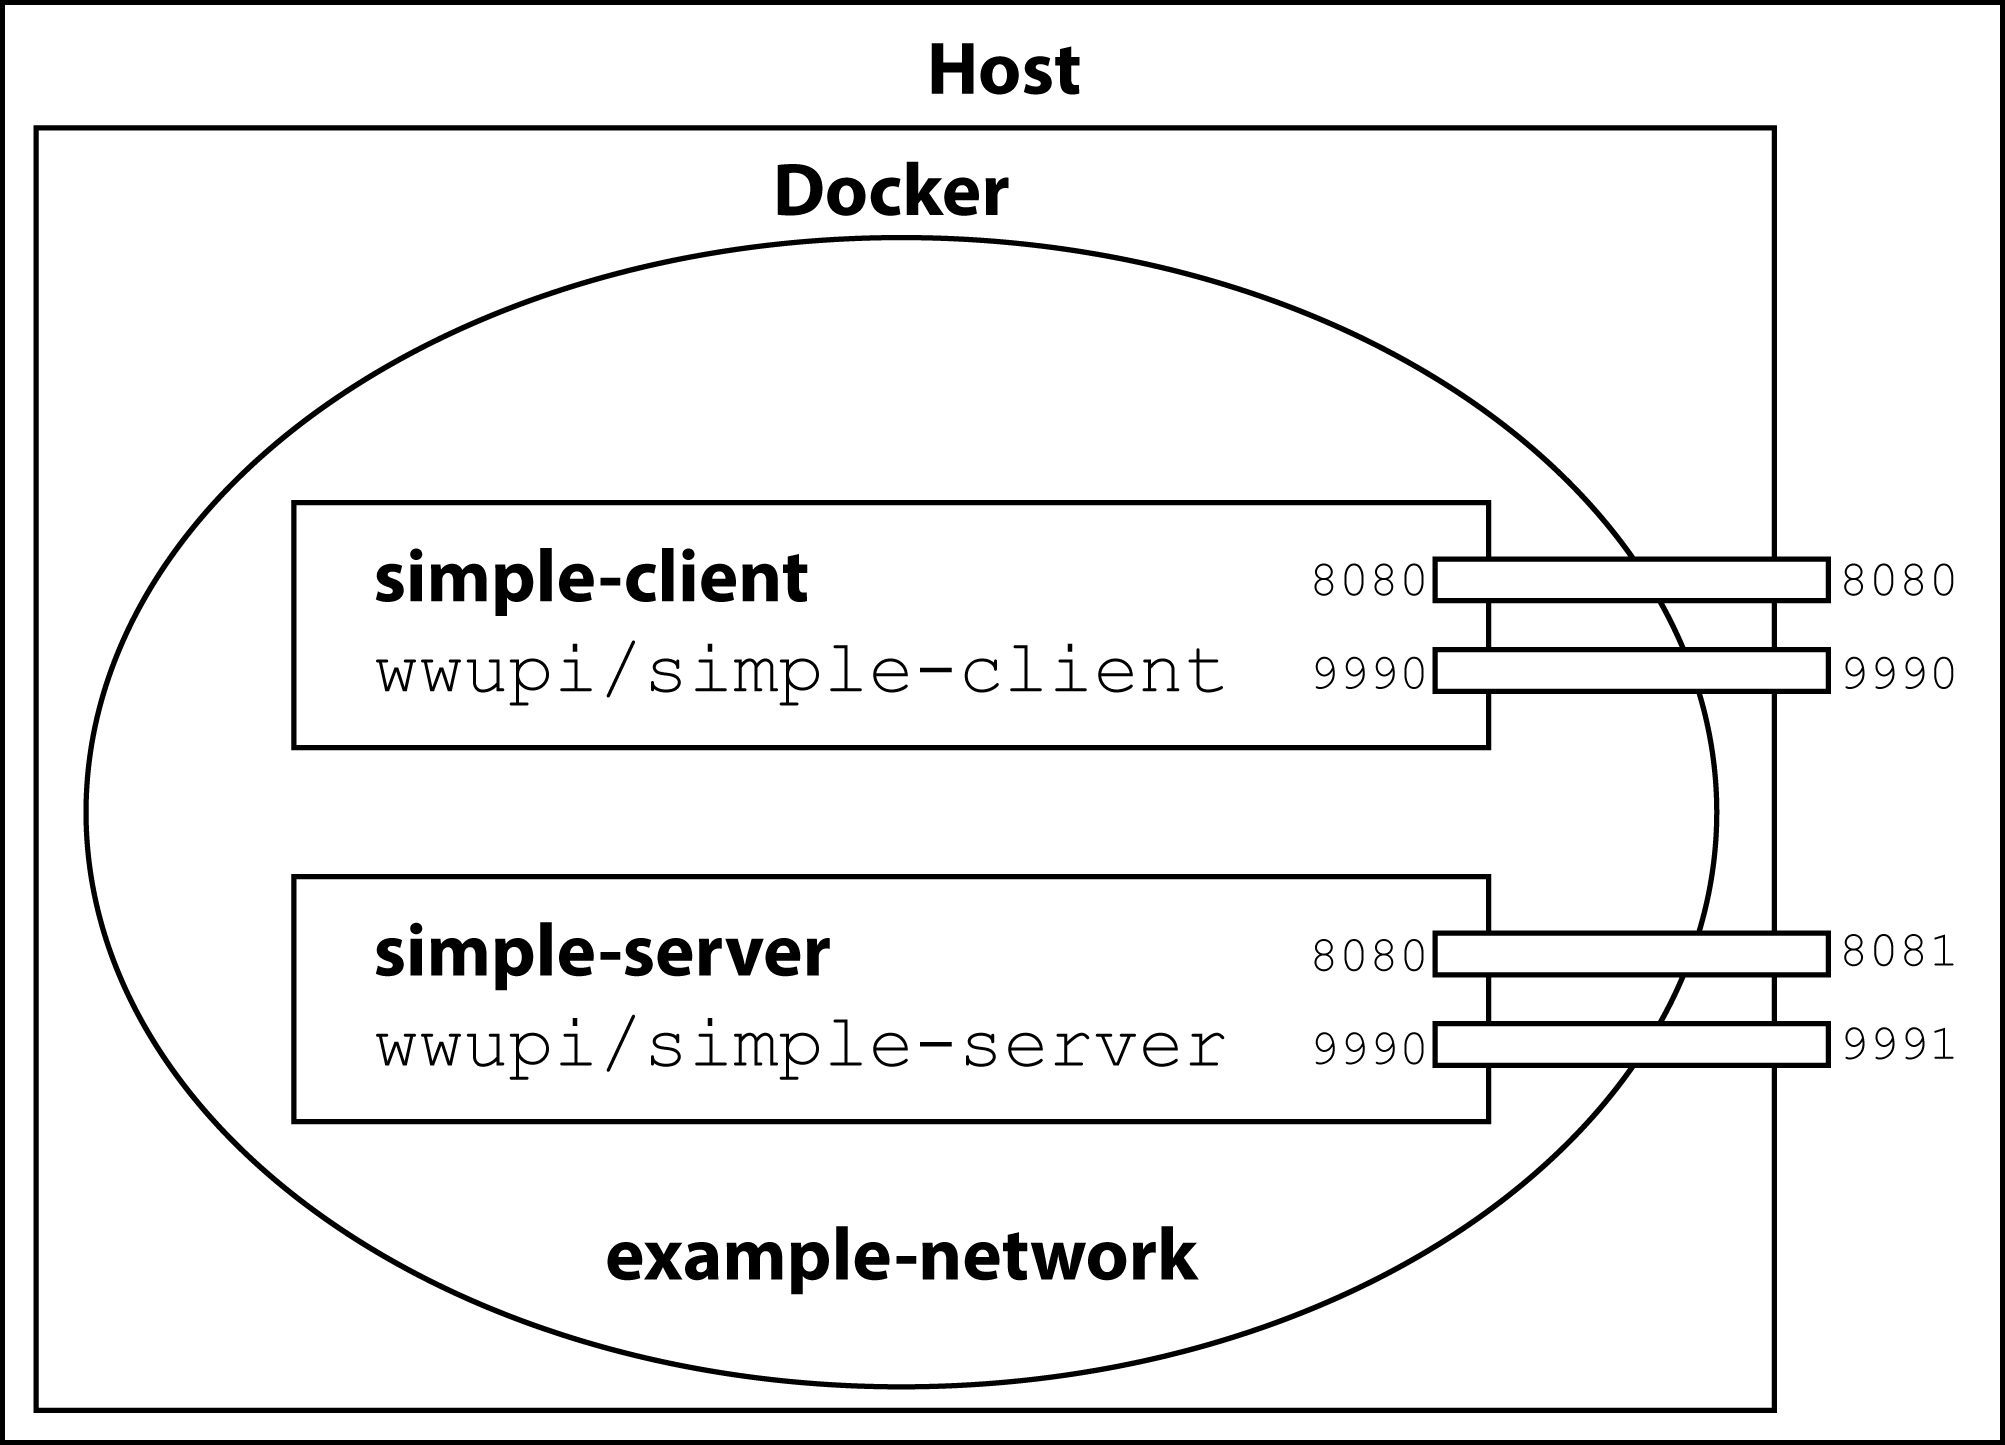
With that the images wwupi/simple-client and wwupi/simple-server are available locally, and, when you executed docker-compose up, two new containers were instantiated from those images. Docker places these containers in a new virtual network and gives each container a separate IP address. To access the services, the ports have to be published. Here a mapping of 8081:8080 means that packages for DockerIP:8081 are routed to port 8080 of that container. Docker further provides a DNS server within the virtual network. Because Docker assigns the IP addresses randomly, the containers need a way to find each other. The internal DNS server provides that by resolving the name of the container to its IP address. The SimpleClient can hence communicate with the SimpleServer via http://simple-server:8080.